No edit summary Tags: Visual edit apiedit |
No edit summary Tags: Visual edit apiedit |
||
| Line 1: | Line 1: | ||
| ⚫ | |||
| − | {{WIP}} |
||
| ⚫ | |||
| ⚫ | |||
| + | As noted by [[Trish]], the [[Highway]] (either day or night) is a safer, lower-level place to explore for loot and experience, but it does not have the quantity of food and materials required to advance. |
||
| ⚫ | |||
== Enemies == |
== Enemies == |
||
* [[Bitten Pedestrian]] |
* [[Bitten Pedestrian]] |
||
| − | * [[ |
+ | * [[Bitten Cheerleader]] |
| + | * [[Dark wolf]] |
||
* [[Head Nurse]] |
* [[Head Nurse]] |
||
| − | * [[Infected Nun]] |
||
| − | * [[Infected Police Officer]] |
||
| − | * [[Infected Prisoner]] |
||
* [[Infected Soldier]] |
* [[Infected Soldier]] |
||
| − | * [[ |
+ | * [[Infected Police Officer]] |
* [[Rager]] |
* [[Rager]] |
||
| − | * [[Undead Grenadier]] |
||
* [[Undead Nurse]] |
* [[Undead Nurse]] |
||
* [[Undead Wolf]] |
* [[Undead Wolf]] |
||
| − | * [[Underhanded Suit]] |
||
* [[Unsteady Vagrant]] |
* [[Unsteady Vagrant]] |
||
| − | * [[Waking Prisoner]] |
||
* [[Zombie Cheerleader]] |
* [[Zombie Cheerleader]] |
||
* [[Zombie Leader]] |
* [[Zombie Leader]] |
||
| − | * [[Zombie Butcher |
+ | * [[Zombie Butcher]] (boss) |
== Events == |
== Events == |
||
{| class="article-table" |
{| class="article-table" |
||
| − | !Abandoned |
+ | !Abandoned camp |
|- |
|- |
||
| − | |'' |
+ | |''The group comes across an abandoned camp. These are great for finding snacks, food or supplies that may have been left behind.'' |
| + | * Loot (random loot) |
||
| − | * Loot - success: snacks/food/supplies |
||
* Move on |
* Move on |
||
| + | Since there are no negative consequences it always makes sense to choose the "loot" option. |
||
| + | |- |
||
| + | !Abandoned church |
||
| + | |- |
||
| + | |''Exploring the deep woods has paid off. You discover an abandoned church in a small clearing. It could contain items such as bandages, serum, medkits or even valuable tools.'' |
||
| + | * Lock picking ([[Cunning]]) - success: random loot, failure: ambush |
||
| + | |||
| + | * Move on |
||
| + | If you are low on health this can be a bit of a gamble since an ambush guarantees a full round of damage, so lock pick at your own risk. |
||
| + | |||
| + | |- |
||
| + | !Abandoned house |
||
| + | |- |
||
| + | |''The group discovers an abandoned, but locked house in a clearing; an ideal potential source for materials, ammunition parts or ammunition. Beware of scavengers.'' |
||
| + | * Lock picking ([[Cunning]]) - success: random loot, failure: ambush |
||
| + | * Move on |
||
| + | As with all ambush consequences, make sure your characters are not low on health before attempting this, since an ambush guarantees a full round of damage. |
||
| + | |- |
||
| + | !Boy |
||
| + | |- |
||
| + | |''You happen upon a ragged, hungry looking young boy. He pleads for your help.'' |
||
| + | * Give the boy some food ([[File:Rations.png|35x35px]] x2) (reward: ammunition ?) |
||
| + | * Offer medical assistance ([[Medical]]) - success: ammunition, failure: ambush |
||
| + | * Ignore the boy and move on - ambush |
||
| + | <nowiki> </nowiki>The boy frequently seems to give gold ammunition, making helping him will worth it. Often however, he will give you nothing. If you ignore him or fail when offering medical assistance you will be ambushed, so be careful. |
||
| + | |- |
||
| + | !Berries |
||
| + | |- |
||
| + | |''You happen upon bushes filled with berries.'' |
||
| + | * Collect berries [[File:Rations.png|35x35px]] |
||
| + | * Move on |
||
| + | No negative consequences; always collect. |
||
| + | |- |
||
| + | !Bucks grazing |
||
| + | |- |
||
| + | |''You discover a group of bucks grazing. You consider hunting them to gather additional ration supplies for the camp.'' |
||
| + | * Hunt ([[Survival]]) [[File:Rations.png|35x35px]] |
||
| + | * Move on |
||
| + | There doesn't seem to be any negative consequence for failing the hunt, so it is always worth a try. During one particular mission this event is much more common. |
||
| + | |- |
||
| + | !Bunker |
||
| + | |- |
||
| + | |The group discovers the entrance to a bunker. It is easily opened. |
||
| + | * Rest in the bunker - Heal party, sometimes random loot |
||
| + | * Move on |
||
| + | There are no negative consequences for resting, and sometimes you'll find random loot, so it is always worth doing. |
||
|- |
|- |
||
!Cave |
!Cave |
||
| Line 50: | Line 91: | ||
!Crate |
!Crate |
||
|- |
|- |
||
| − | | |
+ | |You find a crate. An atrocious odor seems to be coming from inside of it. |
* Try to open ([[Cunning]]) - success: random loot, failure: damage |
* Try to open ([[Cunning]]) - success: random loot, failure: damage |
||
* Ignore |
* Ignore |
||
| + | |- |
||
| + | !Injured dog |
||
| + | |- |
||
| + | |''You stumble upon a dog. The animal whines in pain as it futily tries to escape a trap.'' |
||
| + | * Free the dog ([[Medical]]) - success: random loot, failure: ambush |
||
| + | * Move on |
||
| + | |- |
||
| + | !Lake |
||
| + | |- |
||
| + | |''The group discovers a lake amidst the trees. There are a few wrecked boats jutting from the water, which could be a goldmine in supplies to someone with the proper skills and knowledge.'' |
||
| + | * Dive and investigate ([[Survival]]) - success: random loot, failure: damage |
||
| + | * Move on |
||
| + | |- |
||
| + | !Locked house |
||
| + | |- |
||
| + | |... |
||
| + | |- |
||
| + | !Locked prisoner bus |
||
| + | |- |
||
| + | |''Exploring the far areas of the woods has paid off. You find a locked prisoner transport bus. Dead prisoners lie about here and there. This type of find can be a great source for rare munition materials, rare ammunition or even weapons and clothing of high quality.'' |
||
| + | * Lock picking ([[Cunning]]) - Ammunition parts, ammunition, weapons, or clothing |
||
| + | * Move on |
||
|- |
|- |
||
!Narrow path |
!Narrow path |
||
| Line 72: | Line 135: | ||
* Move on |
* Move on |
||
|- |
|- |
||
| + | !Survivors |
||
| + | |- |
||
| + | |''You see a group of survivors in the distance. They seem to be looking around with mistrust. You consider whether you should approach or avoid them, you hear a noise from the side.'' |
||
| + | |||
| + | '' "Psst hey, perfect timing. We were just checking out that group there and planning on helping ourselves to their stuff. But why dirty our hands when you'll do just as well?"'' |
||
| + | |||
| + | ''"Rob that group. Kill one of them to scare the rest. Let them run off and leave their packs behind. But make sure you only kill one of them."'' |
||
| + | |||
| + | ''"As compensation for your services we'll give you <item>"'' |
||
| + | * Take the Deal |
||
| + | * Refuse the Deal |
||
| + | |||
| + | Killing the whole group results in a fight with the punks. You don't seem to get the original reward upon defeating them. Beware that sometimes even complying with their request and forcing the group to surrender will still result in a fight with the punks. |
||
|} |
|} |
||
| + | |||
| + | == .....== |
||
Revision as of 21:47, 30 August 2017
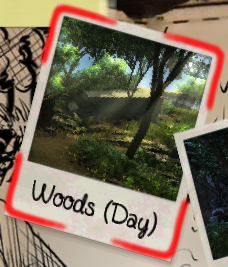
Woods (Day) is generally one of the first areas encountered in the game. It is the go-to for food and materials, but also gives a decent quantity of bullet casings and other materials. Its end-of-area boss is the Zombie Butcher.
As noted by Trish, the Highway (either day or night) is a safer, lower-level place to explore for loot and experience, but it does not have the quantity of food and materials required to advance.
Enemies
- Bitten Pedestrian
- Bitten Cheerleader
- Dark wolf
- Head Nurse
- Infected Soldier
- Infected Police Officer
- Rager
- Undead Nurse
- Undead Wolf
- Unsteady Vagrant
- Zombie Cheerleader
- Zombie Leader
- Zombie Butcher (boss)
Events
| Abandoned camp |
|---|
The group comes across an abandoned camp. These are great for finding snacks, food or supplies that may have been left behind.
Since there are no negative consequences it always makes sense to choose the "loot" option. |
| Abandoned church |
Exploring the deep woods has paid off. You discover an abandoned church in a small clearing. It could contain items such as bandages, serum, medkits or even valuable tools.
If you are low on health this can be a bit of a gamble since an ambush guarantees a full round of damage, so lock pick at your own risk. |
| Abandoned house |
The group discovers an abandoned, but locked house in a clearing; an ideal potential source for materials, ammunition parts or ammunition. Beware of scavengers.
As with all ambush consequences, make sure your characters are not low on health before attempting this, since an ambush guarantees a full round of damage. |
| Boy |
You happen upon a ragged, hungry looking young boy. He pleads for your help.
The boy frequently seems to give gold ammunition, making helping him will worth it. Often however, he will give you nothing. If you ignore him or fail when offering medical assistance you will be ambushed, so be careful. |
| Berries |
You happen upon bushes filled with berries.
No negative consequences; always collect. |
| Bucks grazing |
You discover a group of bucks grazing. You consider hunting them to gather additional ration supplies for the camp.
There doesn't seem to be any negative consequence for failing the hunt, so it is always worth a try. During one particular mission this event is much more common. |
| Bunker |
The group discovers the entrance to a bunker. It is easily opened.
There are no negative consequences for resting, and sometimes you'll find random loot, so it is always worth doing. |
| Cave |
The group discovers a cave. It turns out to be completely empty, but at the end of the cave you spot a deep, dark hole.
If you fail when reaching into the hole you will take some damage, but depending on the state of your party it may be worth the risk for the rewards. |
| Corpse |
Exploring the farther reaches has paid off. You find a corpse that appears to still have usable equipment on it.
Most of the time searching will yield random loot, but occasionally will trigger an ambush (this may depend on the area). |
| Crate |
You find a crate. An atrocious odor seems to be coming from inside of it.
|
| Injured dog |
You stumble upon a dog. The animal whines in pain as it futily tries to escape a trap.
|
| Lake |
The group discovers a lake amidst the trees. There are a few wrecked boats jutting from the water, which could be a goldmine in supplies to someone with the proper skills and knowledge.
|
| Locked house |
| ... |
| Locked prisoner bus |
Exploring the far areas of the woods has paid off. You find a locked prisoner transport bus. Dead prisoners lie about here and there. This type of find can be a great source for rare munition materials, rare ammunition or even weapons and clothing of high quality.
|
| Narrow path |
You pause for a moment. A narrow path branches away. At the end, you discover a dark cave.
|
| Old shack |
The group finds the entrance to an old shack. An ideal spot to make a lookout.
|
| Punk patrol |
Exploring the farther reaches has paid off. You spot a punk patrolling in the distance. He has not seen you, and you could surprise him.
|
| Survivors |
| You see a group of survivors in the distance. They seem to be looking around with mistrust. You consider whether you should approach or avoid them, you hear a noise from the side.
"Psst hey, perfect timing. We were just checking out that group there and planning on helping ourselves to their stuff. But why dirty our hands when you'll do just as well?" "Rob that group. Kill one of them to scare the rest. Let them run off and leave their packs behind. But make sure you only kill one of them." "As compensation for your services we'll give you <item>"
Killing the whole group results in a fight with the punks. You don't seem to get the original reward upon defeating them. Beware that sometimes even complying with their request and forcing the group to surrender will still result in a fight with the punks. |